Hello all! today i will be showing you how to make a simple animation of a block.
Enjoy!

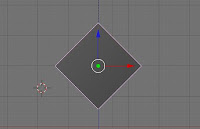
(1) Select add-mesh-plane and place it directly under the default starting block. Select numpad 1 which will give you the view in the above picture(note: you cant see the plane at this point, but it is still there). Then press the letter "I" a list should come up, on the list click on "LocRot" which saves the Location and Rotation of the block.
(2) Next, change the frame value(see above) to 50.
(3) Hold down ctrl and move the block up 1 square. Then, turn it 45 degrees to the right.(see above picture) after doing this press the letter "I" on your keyboard, click on "LocRot" again.
What you can do now is split the blender screen into two segments, the first being your block, the other change the window type to "IPO curve editor" what you have now should look like this:
(4) Now with all that said and done, change the frame value to 100. then turn the block 45 degrees to the right again, move it right one more space, then down one space. Then press "I" and LocRot again, you will see the IPO curve editor window change. It should look like this:
(5) Now change the frame value to 150, then move the block left one space. then press "I" and LocRot again.
(6) Now click on the red button to the left of LocX on the right of the IPO curve editor window(see first picture). After doing this, click on Curve--Extend Mode--Cyclic, which is at the bottom of the IPO Curve Window (see second picture).
(7) Now repeat the exact same thing with LocY, LocZ, RotX, RotY, and RotZ. Basically what you are doing is making the animation repeat itself over and over. The end product should look like this: (this is a slight zoomed out view).
(8) Now that everything is programmed, we can now save the animation into a video file, but first we should look at how to set a duration for how long the animation keeps repeating. press F10 on your keyboard and a new menu on the bottom should show up. Then, you will see "End" in the "Anim" panel. The default value should be 250.
(9) You can also see to the right of "End", in the panel "Format" their is a selection called "FPS"
which means "Frames Per Second" the default should be 25. Basically, it means that ending at 250 frames at 25 frames per second, you would get a 10 second animation. This should be fine.
(10) Now, for saving the animation. You will see right above the "FPS" option their is a "Jpeg" option, this option is basically choosing a format for which to save your animation. Click on it and choose a video file to save it as (example: Quicktime, AVI, etc.). I personally use Quicktime.
(11) Now, we have to choose a place to save our animation, select the folder all the way to left. Its default saved folder should be "tmp"(see picture below). To save it elsewhere click on the folder icon to the left of "tmp" and choose an easy to access area of your computer.
(12) Now, all you have to do is click on "ANIM" and then wait(see first picture). But before doing so you should set the percentage to about 25% to 75% (see second picture). This simply makes the saved video bigger or smaller, and saves more time on saving the animation.
Well, thank you very much for taking this tutorial, i hope it went well for you!
~Nolan


No comments:
Post a Comment