Thursday, May 13, 2010

Tutorial: How to make Liquid - Still life liquid

In this tutorial, I will teach you how to make Liquid Animations.

CLICK ON THE IMAGES TO ENLARGE! 
It will show you where to navigate to!

Part 1: Objects
This is a basic setup of liquid. You can change these objects if you want, but I recommend following through once the whole way.


Delete your cube

Add a cylinder (Space-Add-Mesh-Cylinder) with standard settings.

Move the Cylinder up 8 spaces (G-Z-8)

Add a plane (Space-Add-Mesh-Plane)

Scale the plane by 10 (S-10)

Add a cube (Space-Add-Mesh-Cube)

Go into Wireframe mode (Z)

Scale the cube by 10 (S-10)

Move the cube up 10 (G-Z-10)


^ This is what it should look like. Note: there is a plane there, but you can't see it because its inside the cube wall.

Part 2: Physics
Now we change the settings for these objects.

The Cylinder:

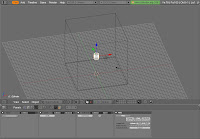
Select the Cylinder and go to Object (F7). Than go to Physics Buttons (No hotkey) and select (from the far right) Fluid, than again from the sub-menu, Fluid

This will, after baking, make the area inside the cylinder a liquid.


The Cube:

Select the Cube and go to Object (F7). Than go to Physics Buttons (No hotkey) and select (from the far right) Fluid, than Domain

This will make the cube the area wherein the fluid will render. Any fluid that would go outside the area of the cube will hit an invisible wall.


Part 3: Bake

Now, with the cube still selected, press Bake

Kapow! Suddenly your screen freezes, the cube vanishes, and a gray blob falls from the cylinder only to vanish or shatter (depends on the computer). What went wrong?!


Answer: Nothing. Once your screen unfreezes or you press escape to cancel, you can scroll through your animation using the arrow keys. You can render your current frame at any time. It won't look like fine art, but with a little tweaking it should look very smooth.

Part 4: Tweaking

There is a very useful thing you can do when you select either the cube or the liquid (the liquid now counts as the Domain object - you can move the cylinder if you want because it serves no purpose); You can change the resolution of the liquid.

Next to the Bake button, there is a Resolution button (res) that defaultly says 50. You can change that to be higher and your liquid will re-bake (by clicking Bake again) to a higher resolution. If you change this to be too much higher, it will take longer to bake. My wine glass render (Res was at around 80) took up to 2 minutes a frame, and the full animation took around 3 hours.

You can also set the object to Smooth just as normal, and material settings also apply.

Part 5: Changes

Simply put, you can only have 1 domain, but you can stick as many fluid objects as you want in the render. Also, none of the objects have to be in the shape that I used them for in this tutorial. You could stick two tubes of liquid at opposite ends of the domain and watch how the fluids interact, for example. It'll just take a long time to bake.

Part 6: End Notes

In my next installment of this tutorial, I will show you how to export animations as Movies that you can upload to flickr. I will use this tutorial's results as the base of the next tutorial, so save anything you would want to view as a video.

Tuesday, May 11, 2010

Glug Glug Glug


Originally uploaded by LegoManJosh
An animation of wine. The meshes were impossibly easy to make because of the spin tool ( Love it ), and the whole thing took around 3 hours to render fully from frame 43 to 280.

~ Josh

Thursday, May 6, 2010


Hello all! today i will be showing you how to make a simple animation of a block.
Enjoy!


(1) Select add-mesh-plane and place it directly under the default starting block. Select numpad 1 which will give you the view in the above picture(note: you cant see the plane at this point, but it is still there). Then press the letter "I" a list should come up, on the list click on "LocRot" which saves the Location and Rotation of the block.


(2) Next, change the frame value(see above) to 50.


(3) Hold down ctrl and move the block up 1 square. Then, turn it 45 degrees to the right.(see above picture) after doing this press the letter "I" on your keyboard, click on "LocRot" again.
What you can do now is split the blender screen into two segments, the first being your block, the other change the window type to "IPO curve editor" what you have now should look like this:


(4) Now with all that said and done, change the frame value to 100. then turn the block 45 degrees to the right again, move it right one more space, then down one space. Then press "I" and LocRot again, you will see the IPO curve editor window change. It should look like this:


(5) Now change the frame value to 150, then move the block left one space. then press "I" and LocRot again.

(6) Now click on the red button to the left of LocX on the right of the IPO curve editor window(see first picture). After doing this, click on Curve--Extend Mode--Cyclic, which is at the bottom of the IPO Curve Window (see second picture).


(7) Now repeat the exact same thing with LocY, LocZ, RotX, RotY, and RotZ. Basically what you are doing is making the animation repeat itself over and over. The end product should look like this: (this is a slight zoomed out view).


(8) Now that everything is programmed, we can now save the animation into a video file, but first we should look at how to set a duration for how long the animation keeps repeating. press F10 on your keyboard and a new menu on the bottom should show up. Then, you will see "End" in the "Anim" panel. The default value should be 250.


(9) You can also see to the right of "End", in the panel "Format" their is a selection called "FPS"
which means "Frames Per Second" the default should be 25. Basically, it means that ending at 250 frames at 25 frames per second, you would get a 10 second animation. This should be fine.

(10) Now, for saving the animation. You will see right above the "FPS" option their is a "Jpeg" option, this option is basically choosing a format for which to save your animation. Click on it and choose a video file to save it as (example: Quicktime, AVI, etc.). I personally use Quicktime.

(11) Now, we have to choose a place to save our animation, select the folder all the way to left. Its default saved folder should be "tmp"(see picture below). To save it elsewhere click on the folder icon to the left of "tmp" and choose an easy to access area of your computer.


(12) Now, all you have to do is click on "ANIM" and then wait(see first picture). But before doing so you should set the percentage to about 25% to 75% (see second picture). This simply makes the saved video bigger or smaller, and saves more time on saving the animation.


Well, thank you very much for taking this tutorial, i hope it went well for you!
~Nolan